Thursday, March 31, 2011

Front room progress


Rachel insisted we buy this gold geometric mirror from Home Goods a week ago, I was less sure at first, but she was right it looks really cool.

Unfortunately, they only had one gold one and one silver one. We bought the gold and thought we'd pick up another gold one at one of their other stores. Well, we tried their Roseville store, no luck. Rachel's dad looked at the Stockton one, nothing. We looked at a few Ross', nothing. Eventually, we gave up, bought the other silver one and I painted it 2 nights ago.

I was thinking that I'd have to paint both to get them to match well enough, but turns out I did a good enough job that I only have to paint the one.

The biggest pain was masking it all off. This took maybe 45-60 minutes. Then I sprayed it with grey primer, then glass black and then the final gold.

I had tested base colors prior and found that by putting the gold over black, the color came out a little golder, a little richer.

The left mirror looks a little crooked, but it's not: the fireplace is! The print above the mantle is too small we'll replace it with something more fitting in the future. Also, we have plans of painting the coffee table and recovering the chairs.

Wednesday, March 30, 2011

Tuesday, March 29, 2011

Glass knobs in the bathroom

We haven't posted much about our gray bathroom, but it is almost done. We just bought a set of 10 glass knobs off of eBay for $2.50 shipped each. They sell anywhere from $4 - $5 in the store.

Monday, March 28, 2011

Simple As a Can of $#!&ing Paint

How many times have you read in your favorite decorating magazine or blog that a room make-over “may be a simple as a can of paint”? Well, as it turns out, this is nothing but a lie. Apparently you can’t just buy paint and then paint – it is SO much more involved. It includes:
Sanding
Washing
Drying
Priming
Drying
Fixing the primer
Painting
Drying
Hoping you don’t mess up the paint, and then
Deciding if what you’ve messed up is noticeable/livable or not,
and then….either starting over from scratch or deciding you are done.

This is the lesson that I’ve learned from the never-ending sage of painting the bathroom. We finally have a handle on the situation, but it’s taken almost a month, and it is still not freaking done! On Friday, my day off, I spent the good part of the day sanding…I sanded all the paint/primer/paint – whatever off of the bathroom drawers and by Sunday night, they had been cleaned, primed, painted, etc and put BACK IN THE BATHROOM WHERE THEY BELONG! The next step is to finish up the shelves, which should not be as involved. In addition there will be some touch-ups to make and then the fun part begins – decorating!!

I have been scared off a bit from paint, but just the other day, another magazine lured me in to the idea that a can of paint really does have transformative powers:
• A can of paint can change everything. These days they have little sample pints. Try two or three on your wall and see what you think. You’ll know after a week if you can live with it or not.
• The ceiling is the forgotten surface. Paint it a color, or cover it with wallpaper in a small pattern. A pale-blue ceiling brings in the sky; a yellow ceiling adds sunshine.
• If a room has bad bones, paint them out. Doors, window frames, and moldings will disappear if you paint them the same color as the walls. It will hide a million mistakes.

I really want to paint the front room, but I think Jeremy is more scared than I am. He now says only one paint job a quarter. The bathroom is Q1, Bedroom is Q2, and the front room is Q3. I can live with that!

Monday, March 21, 2011

Bathroom upgrades

Here's what else we did this weekend:


Added a few items to the bathroom. Were not a fan of the maroon and yellow tile, but it's going to stay for now.

In the meantime, we added the following:

-bathroom vanity and sink
-bronze faucet
-mirror
-no slam toilet seat
-shower curtain and rug

Who knew that that bronze hardware is twice as expensive as chrome? But chrome just didn't look right. Hard to tell in the photo but the cabinet is a dark brown (not black). We have plans to replace the light fixture also.

Sunday, March 20, 2011

DIY Pendant lamp

This chandelier in the breakfast nook just wasn't our style:

Before we moved in

We liked the look of modern pendants, but not for $300. So I DIY'ed it.  It's actually just a large lampshade (diameter of 16") that we got at Lamps Plus for $40.Then, I got some lamp hardware from IKEA on a recent spree ($13). Lastly, got the small ceiling cover from Home Depot ($6)

I just got done rigging up this pendant lamp in our breakfast nook.

For $59, aint too bad huh?


The round table should be white by the end of the week.

Thursday, March 17, 2011

Raised the table

So I raised the table 3 inches! Now it's normal table height. The next step is to paint it white.

Saturday, March 12, 2011

A new kitchen table

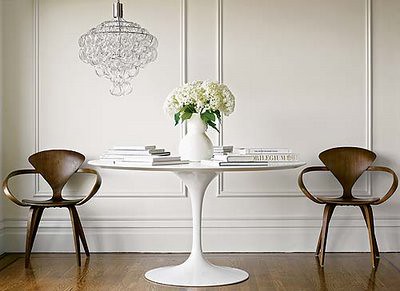
Rachel and I wanted to put a round kitchen table in our breakfast area. We were originally thinking a white Tulip table like this:


But then we started thinking about all of the different shades of white we might have in the kitchen, from the fridge to the cabinets to the tile, to this table. 

So we decided to find a round table we could paint white and then paint the chairs to match, so at least something would match.

A quick Craigslist search discovered this:


I emailed the lady and 2 hours later it was ours! The base (not shown above) is very ornate. We're going to paint the table white-ish and sell the chairs back on Craigslist.

When we got the table home, we noticed it was a little short, 26 inches. So, I sawed off the table top from the base, I will pick up a spacer of some sort at Home Depot tomorrow and raise it 3 inches.


After, this gets heightened and painted a nice crisp white, we think it's going to look awesome, and a perfect candidate to submit to Design Sponge's Before and Afters

Dining room table


We picked up this dining room table off of Craigslist for $300. Comes with two leaves so it'll fit 8 people easy.

Another angle:


note: you can see in the picture above the moulding I've added to the room, both the mid-level wall moulding is new as are the squares.

Friday, March 11, 2011

The eyesore on the block?

Could have easily been this piece of plywood on the side of our garage which greets our neighbors every time they step out their front door.


Shutters on each side of the window that appears to be looking out onto a bird on a limb.

The assumption was that this must be covering something hideous, so hideous that an ugly faded fake window into our garage where apparently there is a bird perched is a better option.

Continuing this assumption, I was thinking it was a window at some point and I'd need to tear it down and get new siding to cover up the old slot.

It took about 90 minutes to remove the 50 screws (maybe 18, but still overkill) and unveil a perfectly good (if not dirty) wall!


Rejoice!

I was expecting neighbors from all around to walk out of their houses doing a slow clap.


http://www.youtube.com/watch?v=QM0dbwDc2FE

Tearing up the carpet

One of the first things we did was tear out the carpet.

From the original walk through, this is the Master bedroom with carpet:


Floors underneath weren't in horrible condition:


After about 12 hours of sanding:


After 4 coats of water based floor sealer:


If you look close, they aren't perfect. But a major improvement!

Repairing a house we don't own

So before we could buy our house, the underwriter wanted us to make some repairs to it. Wait what? Being that it was a short sale, the onus was on us, not the seller. If we wanted it, we needed to make the repairs.

Two things in particular:
  • The front porch post was rotting away and needed to be replaced
  • The under house vents had been plugged up with foam, which may be a partial cause as to why there is water under the house.
So, we fixed it.

Dad removing the old post

5 hours later: Voila


Foam removed, new screens added

We own a house!


Rachel and I got the keys to our 2100 sq ft 4 bed and 2 bath on February 25th 2011.

Here are the photos from the first time we saw it and when we walked through again: link

We first saw the house on November 13th 2010, the house had been on the market for 3 months. We had looked at probably 15 houses prior to this one and a couple others after it that same day. But it was pretty obvious this was the house for us. We went back to our realtor's office and made the offer that day.

From November 13th to February 25th is a pretty long time to wait. It was a short sale, and each affiliated party had to agree/negotiate a little extra money out of the deal.

It was frustrating at times and seemed like it would never end. But it did and in a good way.

The house was built in 1951, hence the name of this blog. We have a lot of work fun ahead of us and we'll document it all here at Circa 1951.